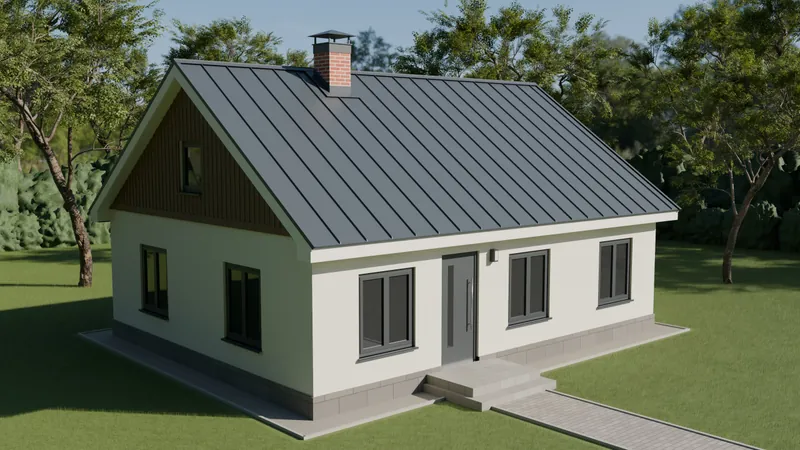
A standing seam roof is the most durable and watertight metal roofing. A properly installed standing seam roof can last 80-100 years or longer. The sheets are joined with a seaming tool – the edges of the sheets are folded into each other, forming the characteristic standing seam. The sheets are fixed to the battens with clips – no fixing element is visible from outside on the finished roof. This design means the roof works as a single monolith without any perforations.
Uses of the standing seam profile:
- Family houses
- Apartment buildings
- Public and office buildings
- Historic buildings where only standing seam roofing is permitted
- Facade and wall cladding
SIA Toode can make standing seam sheets right on the customer’s site with mobile production machines. This makes it possible to produce extra-long sheets – even sheets up to 25 metres can be made to a high quality without damage, because there is no transport risk.
The standing seam profile is also available with a factory-applied sound-absorbing layer – Standing seam profile with SoundControl →
Installation summary
Installing a standing seam roof requires a special seaming tool and an experienced sheet metal worker or roofer. Below is a summary of the main installation stages. When you order the standing seam profile from SIA Toode, we can recommend suitable installers.
Slight waviness of standing seam and Classic-type roof sheets is acceptable and does not in itself indicate a material defect. How noticeable it is can depend on several factors:
- Quality of the deck and battens. The battens must be built precisely, evenly and calibrated. Unevenness in the roof structure can also become visible in the finished roof surface.
- Quality of installation. The roof sheets must be installed according to the installation requirements. The fixings must not be overtightened, because steel needs to be able to expand and contract naturally with temperature.
- Steel thickness. A thicker steel sheet is usually stiffer and looks flatter. For example, 0.60 mm steel will be less prone to waviness than a thinner material.
- Surface coating. A matt, textured coating visually reduces light reflections and therefore also makes any waviness of the sheet less noticeable.
- Natural properties of steel. Internal stresses can arise in the sheet during production, transport, installation and use. Under temperature changes and mechanical loads, they can show as slight waviness of the sheet surface.
That is why the visual result of a standing seam or Classic roof depends not only on the material itself, but also on a correctly prepared roof structure, quality installation and the chosen steel thickness and coating.
Delivery and storage
When receiving the goods, check that all ordered materials have been delivered and that there is no transport damage. Damaged materials must not be installed!
- Store the sheets on crossbeams at least 20 cm above the ground.
- Coloured sheets in sealed packaging – for no longer than 4 weeks.
- Galvanised sheets in sealed packaging outdoors – for no longer than 1 week, because white rust can form in damp weather.
- Lift the sheets with a crane or one at a time from the side – do not push or drag them, as the sharp edges can scratch the surface underneath.
Roof deck and battens
A standing seam roof has strict requirements for the flatness of the battens. Before starting work, check the general condition of the load-bearing roof structure, the strength of the rafters and the straightness of the roof plane.
- Underlay: required for all insulated metal roofs. Follow the underlay manufacturer’s instructions.
- Counter battens and battens: counter battens min. 22×50 mm (32×50 mm recommended); for the battens – dry timber, min. 22×100 mm (32×100 mm recommended).
Installing and seaming the sheets
Installation of a standing seam roof starts by fixing the eaves flashing to the first batten.
- The first sheet is aligned parallel to the eaves and fixed to the battens with clips. The clip is screwed to the batten with 2 screws and then seamed together with the edge of the sheet.
- Each following sheet is placed next to the previous one and seamed with a seaming machine (electric or manual). A double standing seam is formed – it gives the highest watertightness.
- Only step on the flat surface of the sheet between the standing seams – never on the seams themselves.
- The top end of the sheet at the ridge or an abutment is closed with the appropriate flashing – the way the sheet edge is turned up depends on the specific joint.
- Seaming must be done from the bottom up – from the eaves to the ridge – without stopping, so that the standing seam is even along its whole length.
Sound absorption
Standing seam sheets are fixed at their edges, so the middle of the sheet can vibrate in strong wind. To prevent this noise, sound-absorbing strips can be installed under the sheets (from the second batten to the last one before the ridge). Alternatively, order sheets with the factory-applied SoundControl layer, which is the most convenient and effective solution.
Installing the flashings
- Eaves flashing – installed before the sheets; the straightness of its outer edge is critical for all further work.
- Valley – installed before the sheets, from the bottom up; overlap at least 200 mm.
- Verge – installed after the sheets, from the bottom up; overlap at least 50 mm.
- Abutment – at a wall or chimney; the top edge is set into a groove in the wall and filled with sealant.
- Ridge – installed last; overlap 100 mm; do not join with screws in the overlap area.
Cutting and safety
Use tin snips or other non-abrasive tools to cut the sheets. Never use an angle grinder with an abrasive disc – the sparks damage the coating and cause corrosion at the cut edges. Brush away metal filings immediately after cutting.
Always wear work gloves, soft-soled shoes and protective clothing when working. Never stop a sliding sheet with your hand – its edges are sharp and can cause deep cuts.
Maintenance and cleaning
A standing seam roof needs minimal but regular maintenance. At least once a year (preferably in spring), clear leaves, pine needles and other organic material from the roof – this slows down the depletion of the zinc coating. Check and clean the gutters and outlets regularly. Clean the surface with warm water and a soft brush; a pressure washer can also be used. Do not use solvents or other aggressive chemicals. Cover any damaged spots with touch-up paint in the matching colour.