


Solar panel mount for Classic profile metal roofs. The mount is fixed onto the profile seam with a counter plate and one M8 screw, so the roofing is not drilled and the roof stays watertight. Aluminium rails for the solar panels are installed on the mounts.
Technical data
| Parameter | Value |
|---|---|
| Roofing | Classic profile metal roof |
| Fixing | on the profile seam with a counter plate, without drilling the roofing |
| Screw | M8×25 mm with nut, tightening torque no more than 13 Nm |
| Design pull-out load (perpendicular to the axis) | 1,96 kN |
| Design shear load (along the axis) | 2,15 kN |
| Distance between brackets | no more than 1100 mm |
Set contents
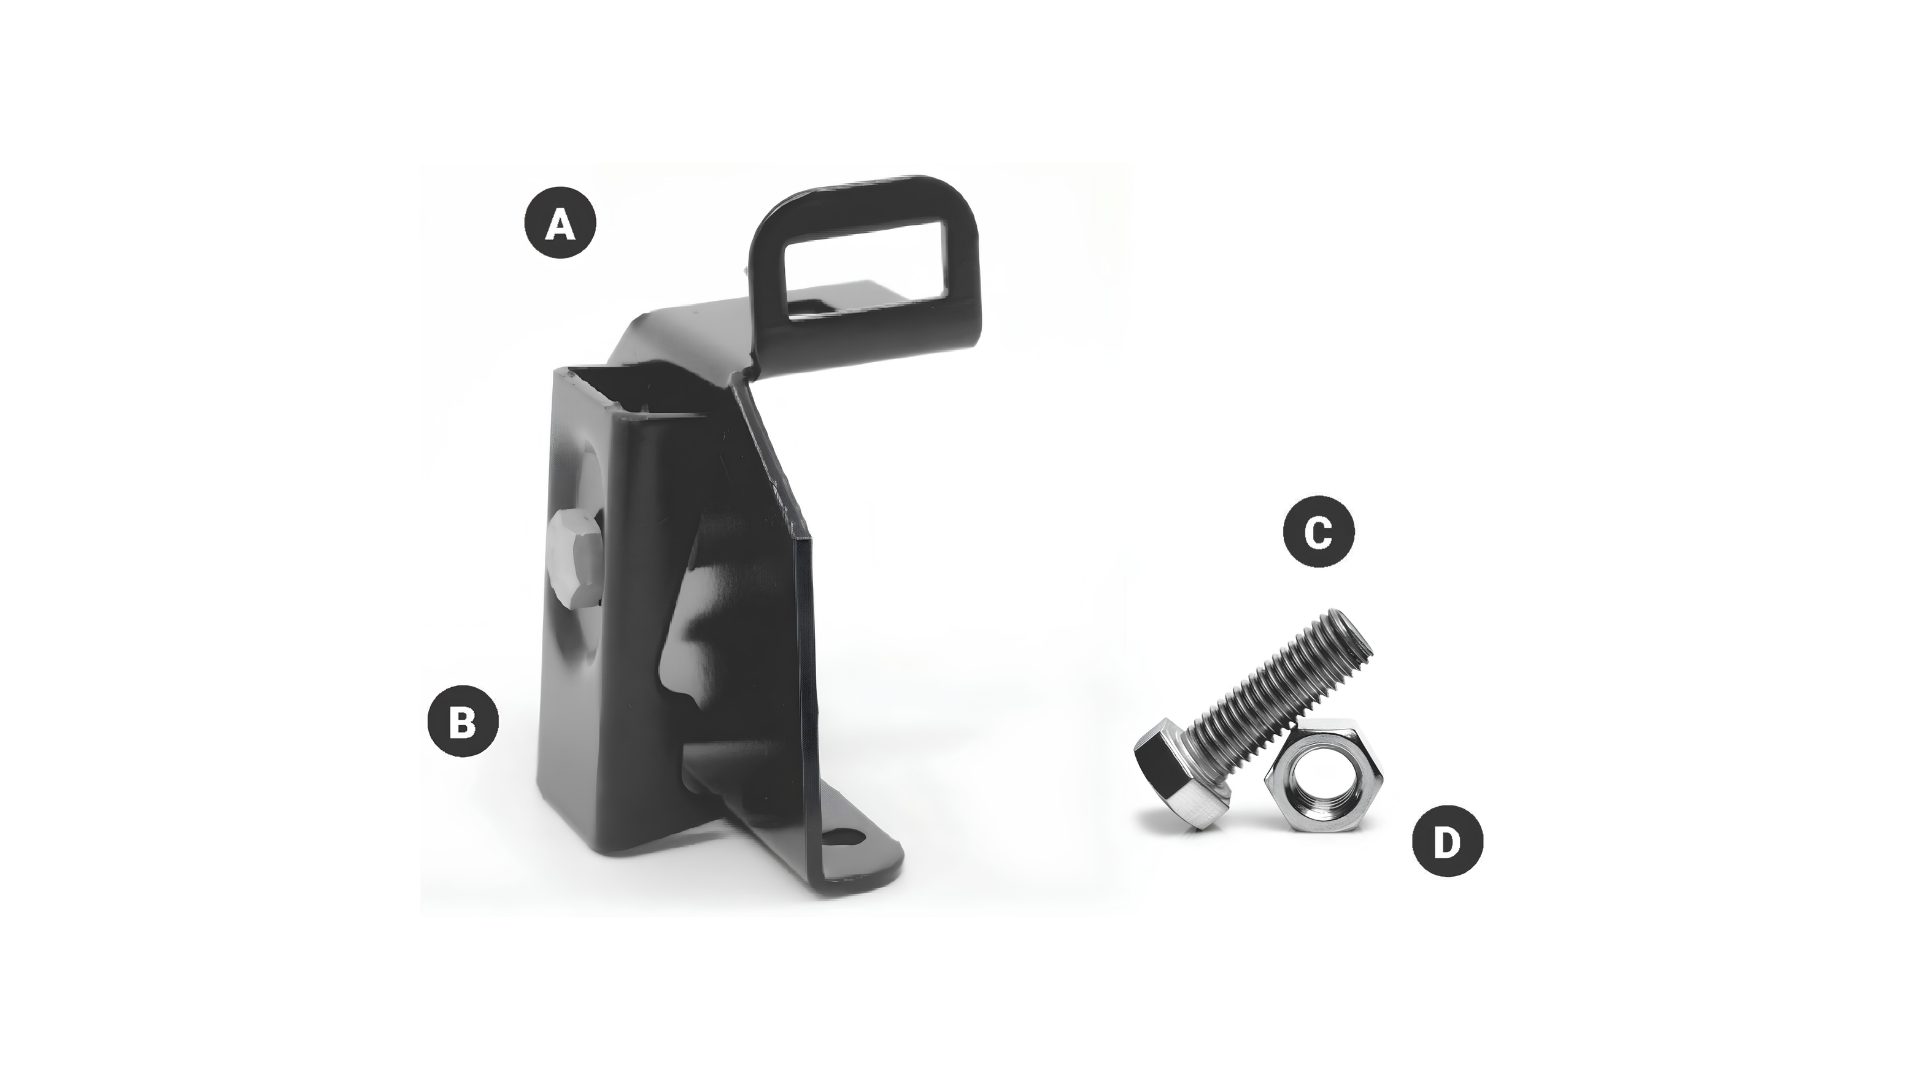
- A – solar panel mount
- B – counter plate
- C – screw M8×25 mm, 1 pc
- D – nut M8, 1 pc
Installation on a Classic profile roof
Place on the seam
The mount (A) is placed on the Classic profile seam, and the counter plate (B) on the other side of the seam.
Tighten the screw
The mount and counter plate are clamped together with an M8×25 mm screw (C) and nut (D). Tightening torque – no more than 13 Nm; the mount must not deform.
Install the rails
The mounts are placed in a row at a spacing of up to 1100 mm, and the aluminium rails are screwed to their loops.
Important: do not tighten the screw with an impact driver or a drill in hammer mode. Use a torque wrench so as not to exceed 13 Nm.
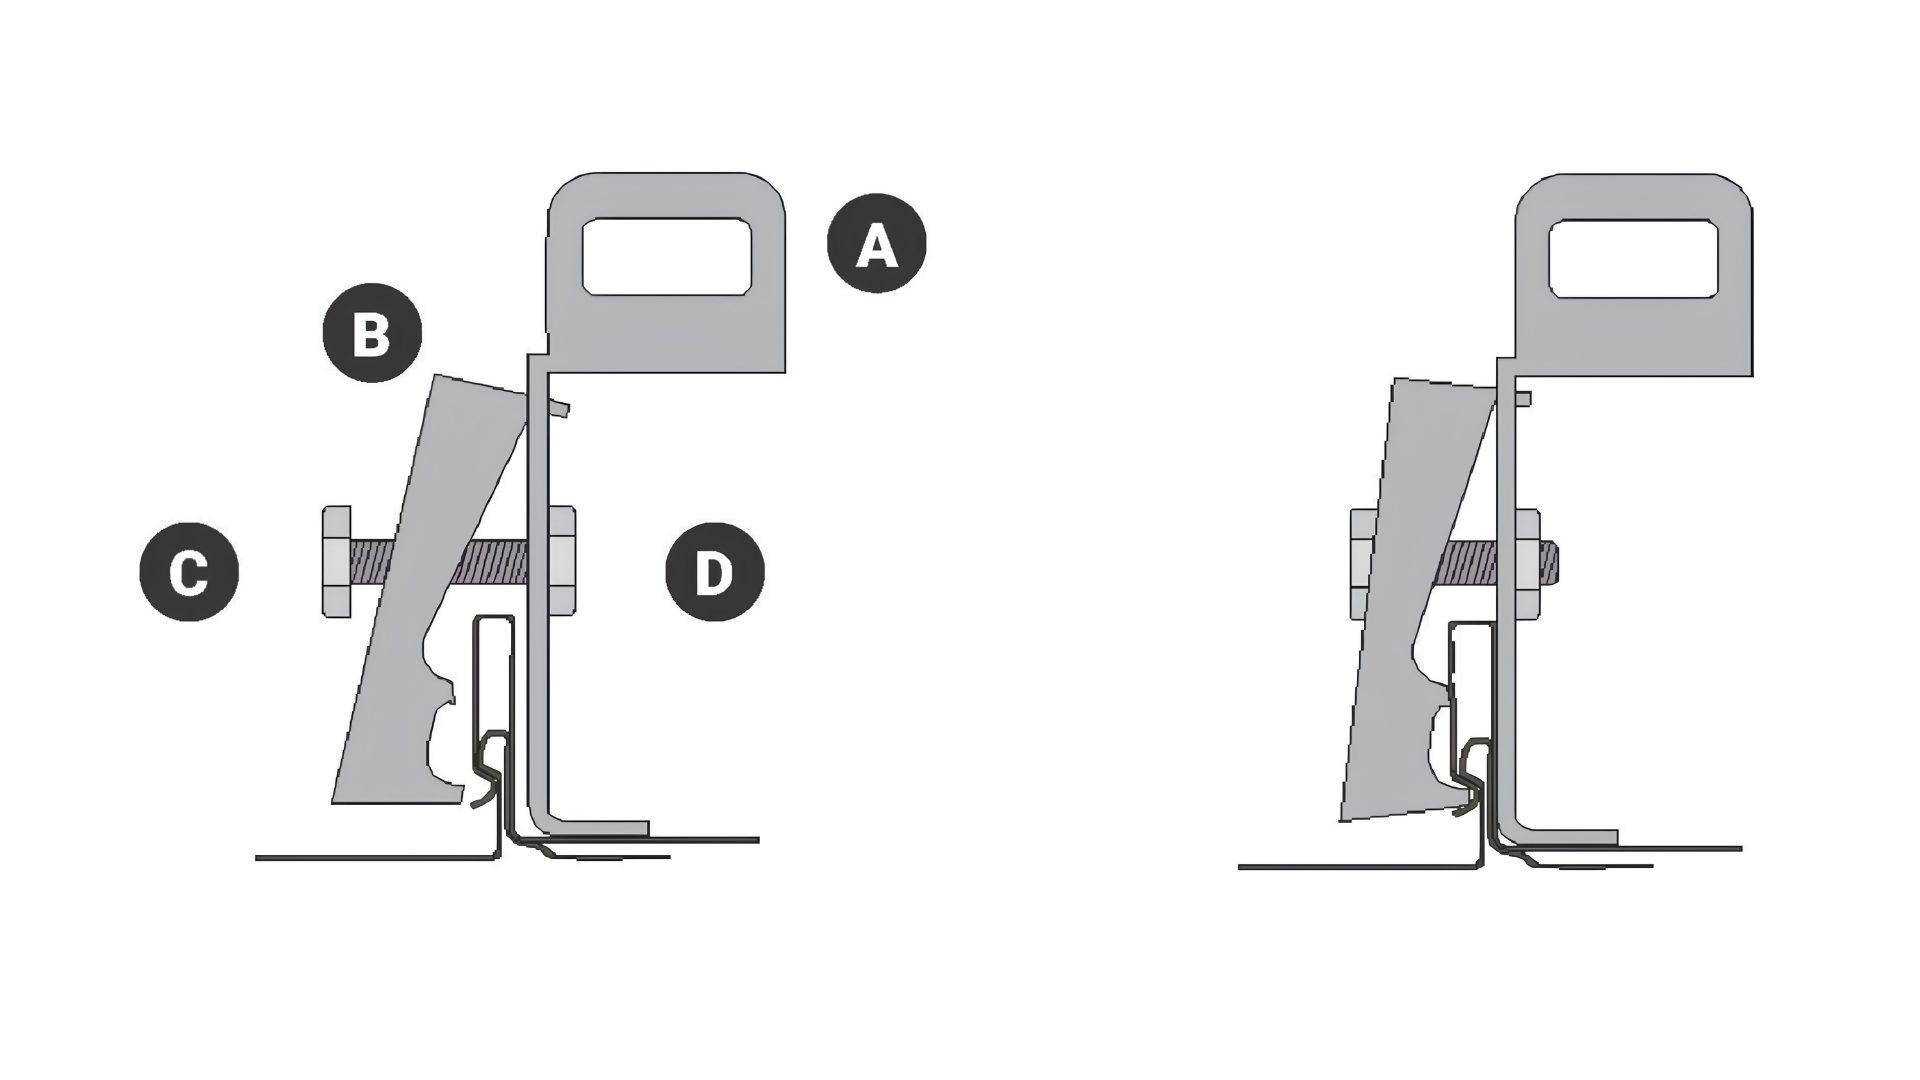
Left – the mount before tightening, right – tightened on the Classic profile seam.
Installing the rails
Aluminium rails are installed on the mounts, and the solar panels are then fixed to them. The rail is screwed to the mount loop with a T-bolt and nut. The rails and their connectors are not included in the mount set.
The manufacturer’s installation instructions specify:
- the first mount – no more than 300 mm from the end of the rail;
- distance between mounts – no more than 1100 mm;
- the rails are joined with a splice, and end caps are fitted at the rail ends;
- because of the thermal expansion of metal, the total length of rails joined in one row – no more than 15 m.

Mount spacing on the rail.

Joining the rails: A – aluminium rail, B – splice, C – end cap.
The number and position of mounts for a specific roof are determined by the solar panel system designer or installer, taking into account the weight of the panels and the wind and snow loads. If you use rails from another system, also follow the rail manufacturer’s instructions.
Which mount suits your roof?
Each metal roof profile has its own mount. All mounts are designed for aluminium rails, with a spacing of up to 1100 mm.
| Roofing | Fixing | Pull-out* | Shear* |
|---|---|---|---|
| Classic profile (this page) | on the seam with a counter plate, without drilling | 1,96 kN | 2,15 kN |
| Standing seam profile | on the standing seam with a counter plate, without drilling | 5,09 kN | 2,55 kN |
| Tile profile | to two battens, 2 screws with sealing washers | 6,00 kN | 7,00 kN |
| Trapezoidal profile | to the batten (2 screws) or on the crest (4 screws) | 6,00 / 2,60 kN | 8,00 / 4,10 kN |
* Design load per mount: pull-out – perpendicular to the mount axis, shear – along the axis. Trapezoidal profile: installation to the batten / on the profile crest.
Maintenance
The mounts will last a long time if they are installed according to the instructions and checked regularly:
- check the joints and the tightness of the screws;
- touch up any worn paint or galvanising with touch-up paint;
- replace mechanically damaged parts;
- regularly clear leaves, needles and other debris from around the mounts and under the panels.

